Table of contents | Choosing the right leather for a Cricut leather bracelet
Introduction to choosing the right leather
Figuring out what type of leather is going to work best for your bracelet is about three things:
- How you want your bracelet to look
- What your cutting machine is capable of cutting
- What type of leather you’re able to get your hands on

Keep reading to learn what to look for when selecting your leather so that you can get the look you want, as well as a good, clean cut.
A note about branded leather and Cricut blades
Consider branded leather to simplify the process
Before you begin the process of choosing your leather, it’s worth noting that if you use leather that has been designed specifically for your cutting machine, you will simplify your life.
For example, Cricut offers a number of options for faux and genuine leather. Since these have been specifically designed to work with Cricut cutting machines, you won’t have to do the work of testing different settings and blades, or take a risk that the machine won’t be able to cut the leather.
That being said, there are a few reasons why you may want to explore other, non-branded leather options:
- You may not have access to Cricut’s branded leathers. I’ve found they can sometimes be sold out in physical and online craft marketplaces, and personally haven’t had luck getting my hands on any. If you’re in a similar boat, you’ll have to explore other options if you want to work with leather.
- You may not like the look and/or feel of the leathers offered by Cricut or other brands. Depending on how you want your bracelet to look, you may have a colour or pattern in mind that Cricut doesn’t offer. There are tons of options once you break away from branded offerings.
- You may want to experiment with other aspects of leather work, such as dyeing or tooling the leather to make your bracelet more unique. In this case, you’d want to start with a blank canvas that you can use as a starting point.

See what Cricut offers: Genuine leather | Faux leather
Cricut deep-point blade vs. knife blade

For those of you using a Cricut machine, you might be wondering if you need the knife blade. For intricate leather bracelets, I would advise against the knife blade, which doesn’t allow for intricate cuts. The deep-point blade works best, which means that you can make leather bracelets without needing a Cricut knife blade.
The knife blade: Cuts thicker leather, but not intricate cuts
The main reason I advise against using the knife blade is because it doesn’t work for the intricate cuts found in a lot of bracelet designs. If the bracelet you would like to cut doesn’t have small cuts, then a knife blade will give you the ability to cut thicker leather using the Cricut. The Cricut website states that “for best results, interior cuts should be no smaller than ¾ inch” in reference to the knife blade.
The deep-point blade: Limits thickness of leather, but makes intricate cuts
For the detailed, more intricate interior cuts in many leather bracelet designs, you’ll need to use the deep-point blade. This will limit how thick the leather can be. It’s best to use the deep-point blade for leather bracelets that will have patterns with interior cuts smaller than ¾ inch.
Before you take the leap and buy leather for your leather bracelet project, consider the following factors to ensure you end up with a bracelet you love.
Factors to consider when selecting leather
1. How you want your Cricut leather bracelet to look
Thinking about how you want your bracelet to look will help you understand what to look for when choosing your leather. Here are some characteristics of leather to think about.

Leather thickness
The basics of leather thickness
The thickness of leather is measured in ounces, which can be a bit confusing if you’re new to the world of leatherworking. A general rule of thumb is that:
1 ounce = 1/64 of an inch in thickness
Thickness is also frequently expressed in millimetres (mm), which I prefer, because it’s more precise and uses the metric system.
Because leather is an animal hide, the thickness can vary slightly throughout, especially with larger pieces. Because of this, you’ll find that the thickness is sometimes expressed as a range (e.g. 3 to 4 oz.). Here’s a handy guide from Tandy Leather:

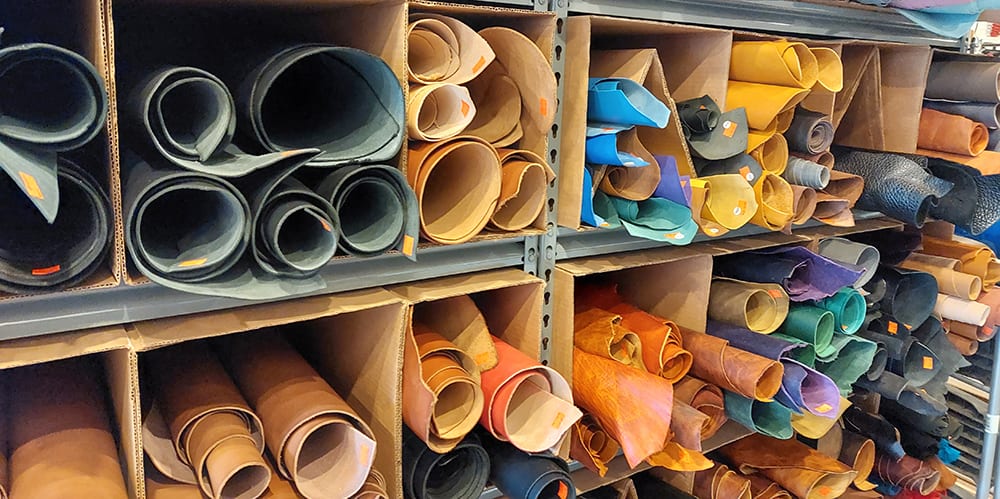
What different thicknesses look like
Leather can come in a variety of different thicknesses, as shown in the photos below.


Options for leather thickness for your bracelet
The thickness of the leather you choose will impact the way the bracelet feels on your wrist, and also how it looks. You have three options, depending on what kind of leather bracelet you’re trying to create and which materials and blades you have available to you:
Option 1: Use 1 to 4 ounce leather (1.3 mm or less) if either of the following apply, and use the deep-point blade.
- Your bracelet has intricate cuts (smaller than ¾ inch)
- Your Cricut model doesn’t use the knife blade, or you don’t have a knife blade
The thinner the leather is, the higher likelihood of a clean and successful cut. But too thin, and it won’t look good and may be too flimsy. Learn more about how different characteristics of the leather impact the quality of the cut and the required settings.
Option 2: Use 4 to 7 ounce leather (1.3 mm to 2.8 mm) if both of the following apply:
- You’re looking to cut just the outline of a bracelet, and don’t have any intricate cuts as part of the design (for example, if you’ll be engraving or embossing it instead).
- Your Cricut model can use a knife blade, and you have one.
Option 3: Use Cricut-brand leather in any thickness (thickness isn’t usually indicated).
- If you’re able to find and get your hands on a Cricut-brand genuine leather that you like for your leather bracelet, follow the recommended setting and blade instructions to cut your bracelet.
Leather finish
Leather comes in all kinds of different finishes. Maybe you already have some idea of the colour and texture you want your leather bracelet to have, or maybe not. Either way, you have tons of options. Here are just a few examples of what’s possible.


You may also want to dye your leather bracelet yourself. Learn about dyeing leather bracelets to see if this is something you’d be interested in. If so, you’ll need to purchase vegetable tanned, unfinished leather (ask the person at the store if you’re not sure).
This is the only leather you’ll be able to dye without having to strip it first.
Leather stiffness
The official term from the leather world used to describe the stiffness of leather is “temper”.
Depending on the look and feel you want for your leather bracelet, you’ll probably want a leather that is semi-soft or semi-stiff.
Very soft leather is used in clothing and upholstery, and acts like a fabric (it’ll be very floppy). You’ll want to avoid this type of leather. But very stiff leathers are also not great for a leather bracelet, since you’ll need to wrap it around your wrist and it won’t be comfortable (or look good) if it’s really stiff.
It can be difficult to tell from an online product image how stiff the leather is, so I recommend checking out your local craft or leather store to get an in-person feel for different types of leathers. You might find something you like, or at the very least leave with a better idea of what to look for when shopping online.


Real vs. faux leather
Faux leather is very popular and can be pretty easy to get if you’d like to avoid animal products. The challenge is that faux leather tends to be very soft and pliable, and you won’t get the same quality look and feel. Your bracelet also likely won’t last as long.
But the benefits are that there are endless options for patterns and textures of faux leather, and it’s also less costly than real leather. It’s especially great if you’re looking to make leather bracelets as a fun crafting project with kids.
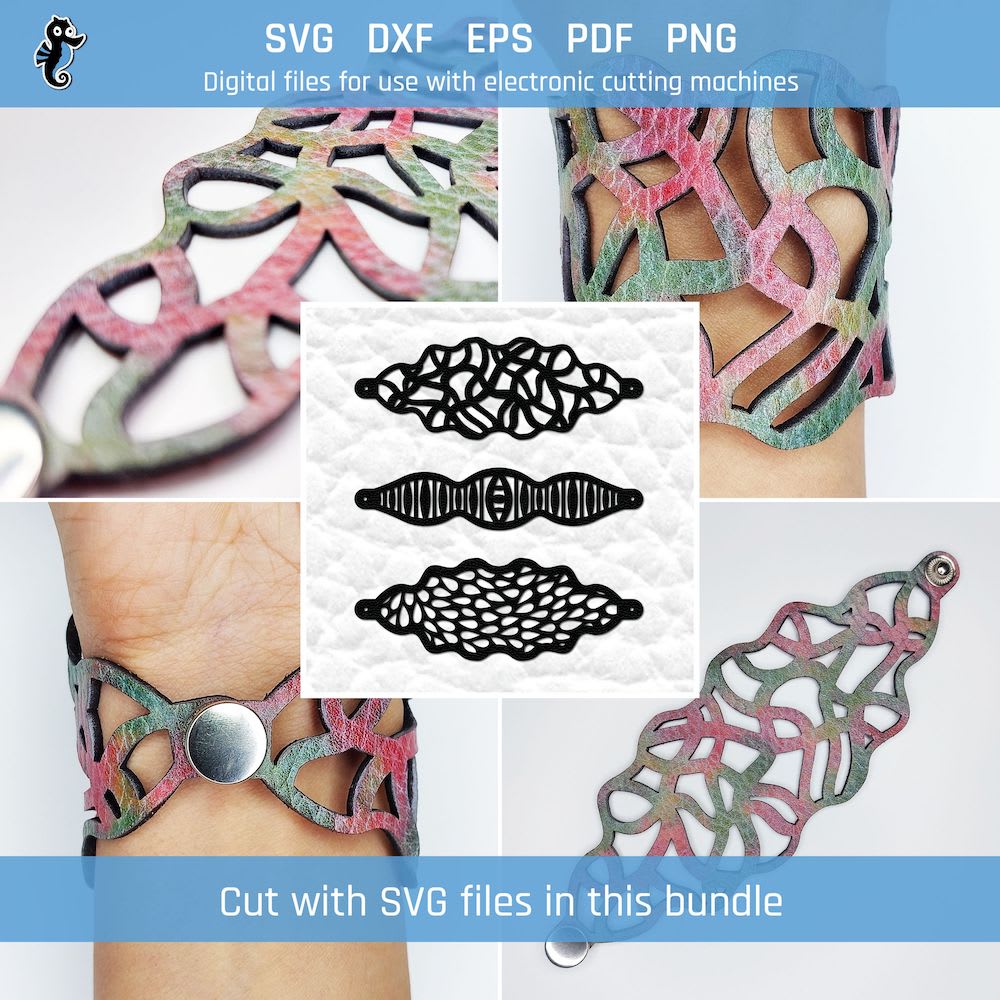
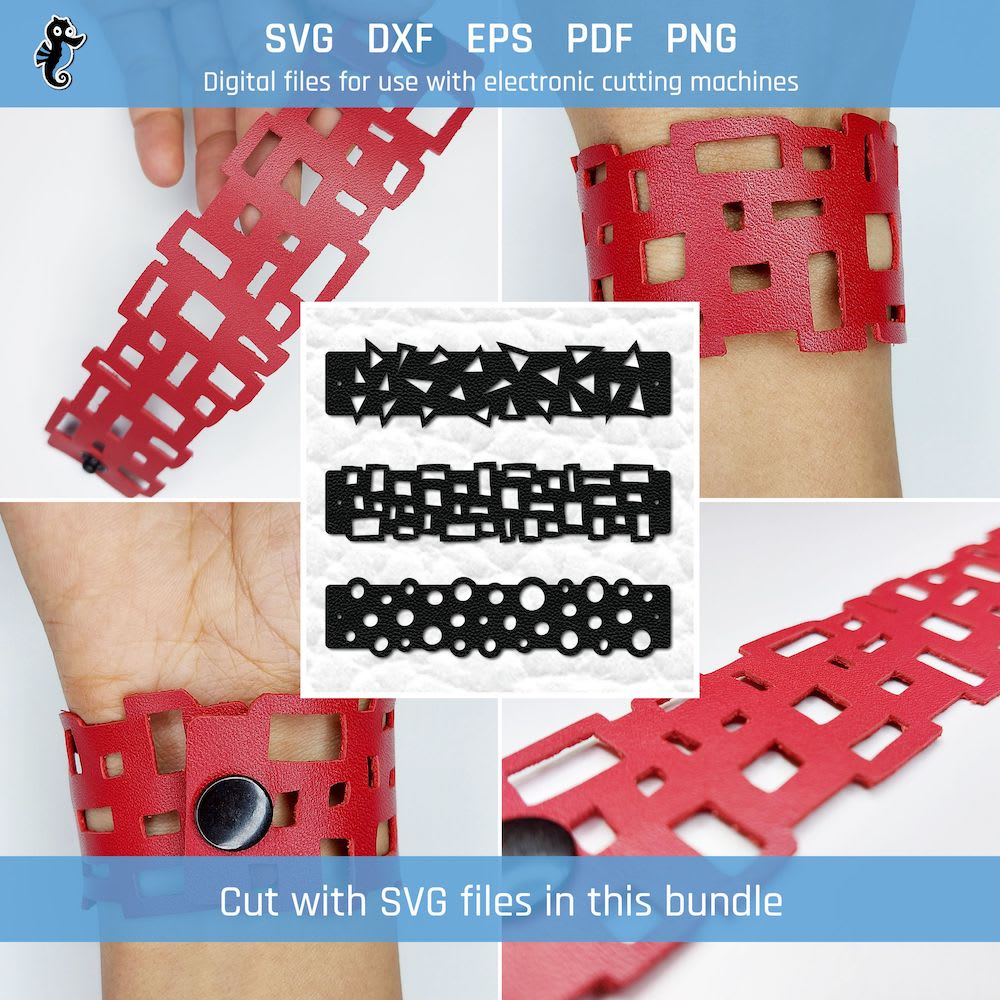
Here are some examples of faux leather to give you an idea of what’s possible.


Decide how experimental you want to get
If you decide to go with Cricut-branded leather, you won’t need to do much work to figure out how to get the best cut; Cricut-branded materials have recommendations that have been tested, and settings are usually built into Cricut Design Space. If that’s the case, you don’t need to worry too much about this section and can probably skip it.
If you aren’t able to find something you like in Cricut’s leather and faux-leather offerings, or you’d rather explore other options, then be ready to do some testing with your Cricut! You’ll need to find out whether it can cut the leather you’ve chosen, and what the best settings are.
Remember that one of the main limitations you will have when cutting leathers with your Cricut is in the thickness your Cricut will be able to cut through with the deep-point blade. Be prepared for some failures; not all leathers will cut well. I’ve even found that leathers that look similar with similar thickness don’t necessarily cut the same, so brace yourself for some surprises.
In a separate article, I take you through a step-by-step tutorial for finding the right Cricut settings to cut your leather bracelet. Be sure to check that out once you’ve gotten some leather to work with.
When you discover that one of the leathers you’ve fallen in love with also cuts well, it’s immensely satisfying. Your bracelet will end up looking fantastic, so be persistent! In my opinion, those *SUCCESS* moments are one of the funnest parts of crafting. 😉
Where to find leather
One other thing to consider is what you can actually get access to. Here are places to look for materials.
Local craft shops:
-
- See what’s in your area. It might be worth calling ahead to make sure they carry leather. Not all of them will.
Local leather shops:
-
- Leather shops will be your best bet. They will often have bags or boxes of scraps that you can dig through to find things that might work. This is also great for testing. It’s cost-effective, and you can try a bunch of different things without having to invest in a larger piece of leather without knowing for sure that it will cut well.
Thrift shops:
-
- I haven’t had much luck with this, but some people are able to find used purses, belts, boots, jackets, etc. that have a leather suitable for their leather bracelet. May be worth a shot, but remember that very soft leathers that are “floppy” won’t be great for bracelets.
The internets:
-
- There are tons of options online, from Amazon to well-known leather suppliers, to local leather shops. Do some searching to see what you can get delivered, but keep in mind that shopping online will come with the risk of not being able to check the look and feel first-hand.
Conclusion and next steps
As you can see, there are lots of exciting leather options for creating leather bracelets with your Cricut (or other) cutting machine. Once you’ve gotten your hands on some leathers you like, you may want to find a bracelet design you love for your Cricut leather bracelet.
You can also explore these other topics: