Table of contents | Finding Cricut settings for leather
- Introduction
- What you’ll need
- Finding the right settings through testing
- Step 1: Estimate your starting settings
- Step 2: Create a new Custom Material with your test settings
- Step 3: Fill out the tracking sheet
- Step 4: Download the test file to use in testing
- Step 5: Open the test file in design space and size it correctly
- Step 6: Prepare the leather for cutting
- Step 7: Set up and run your first test cut
- Step 8: Examine the results and refine settings as needed
- Step 9: Run another test cut
- Step 10: Repeat steps 8 and 9 until you’re happy with the cut
- Conclusion and next steps
Introduction to finding Cricut settings for leather
Before you cut a new leather with your Cricut as part of a project, it’s best to do some testing to find the right Cricut settings for it.
This article walks you through a simple process that will help you test new leathers while also:
- Keeping track of the settings for each new leather.
- Wasting as little material as possible on tests.
- Getting a sense of how intricate your project can be with a particular leather.
What you’ll need
A) Your leather(s) of choice
You can use this process for however many new leathers you have that you’d like to find the correct Cricut cut settings for.
You’ll follow the process for one leather at a time, and then repeat as needed.
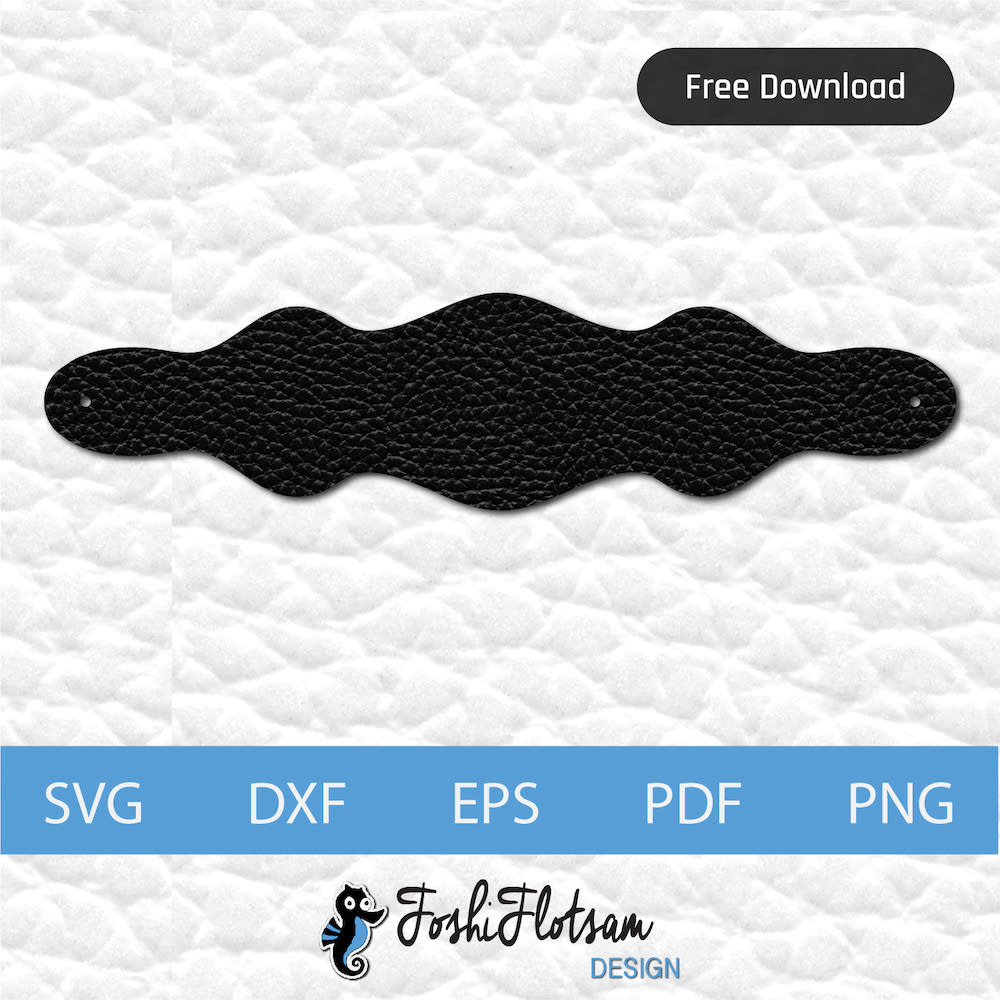
As an example, I worked through this process for the piece of leather pictured below. I hadn’t cut it before, so I needed to identify the best settings before using it in a project.

B) A test file
To minimize waste while you’re testing, be as efficient as possible with the leather you have. It’s best to cut something that is small in size, and gives you a good sense of the level of detail you can cut on different settings, and with different leathers.
This is the test file I like to use; I usually keep the size to 1 by 1.22 inches. You can download it for free below if you’d like to use the same file.

Both formats included in the ZIP folder below will work in Cricut Design Space. You can use whichever one you’re most comfortable with.
Download shell test PNG and SVG files [ZIP file, 19 KB]
Using this file will let you:
- Use only a small amount of leather for each test so that you can save as much leather as possible for your project(s).
- Accurately compare each test cut to other test cuts:
- Of the same leather using different Cricut settings.
- Between different leathers.
- Test how well the Cricut can cut your leather at different levels of intricacy. This way, you can match the leather to the level of detail required for your project.
If you decide to use a different file, make sure that the design matches the intricacy of the bracelet pattern you’re planning to cut. Even if the Cricut can cut a clean square out of leather, that doesn’t mean it’s going to do well when the pattern gets more detailed.
C) A tracking sheet
You can keep track of your tests using the table below. Use one table per leather sample. Each row represents a test run, with the settings used for that test run indicated in the rest of the row. There is also space to make notes about what happens during each test.
This approach keep things organized by ensuring you’re tracking and recording everything.
You can download a template of this spreadsheet [ZIP file, 40 KB] if you’d like to use this approach.

D) A Cricut StrongGrip mat
To cut leather, you’ll need a StrongGrip mat. This is because the leather needs to stick securely to the mat as it cuts, or it will move or bunch up and ruin your cut.

E) StrongGrip transfer tape (optional)
Leather can make a mess of your mat. If you want to keep it as clean as possible through this process, consider using StrongGrip transfer tape. The extra layer between your mat and the leather will minimize the mess that gets stuck on your mat.
Learn how to protect your Cricut mat with transfer tape when using leather.
F) Calipers or a good ruler
The best tool to use is a set of calipers, like the ones below. If you don’t have calipers, you can use a high-quality ruler.
If you measure in inches, you can convert to millimetres.

Finding the right settings through testing
Step 1: Estimate what Cricut settings to start testing with
a) Measure the thickness of the leather you’ll be cutting
Measure the thickness of your leather sample in millimetres (mm) using calipers or a really precise ruler.
Using calipers, I found that my leather was 0.9 mm in thickness.

b) Estimate Cricut settings for your leather
Start with the reference table below
In a previous article, I carried out extensive testing on a range of different leathers to see which cut settings work best for leather based on thickness and other characteristics. Then, I created the table below as an easy reference.
Each leather may require slightly different settings, so this is great to use for a rough estimate of settings to start with.
Without going into detail, leather thickness is often reported in “ounces”. You don’t really need to worry about that here, but if you’re curious you can learn more about how leather thickness is measured and reported.
The Cricut settings you’ll need to identify for your leather sample are:
- Cut pressure
- Multi-cut (the number of passes the machine will take for each cut)
- Pressure (the drop-down option just before starting the cut where you can specify less, default, or more pressure)
My sample landed between the first two rows of the table since the leather is 0.9 mm thick. This meant that my first test should be run with settings in the following ranges:
- Cut pressure: 325 to 350
- Multi-cut: 2X
- Pressure: Default to more
Take a look at where your sample lands on the table based on thickness, and write down the approximate ranges for each of the three Cricut settings.
Refine based on leather characteristics
In the same previous article, I discussed how different leather characteristics will impact the Cricut settings that work best. Read through the section called “Things to consider: Leather characteristics that will impact your settings” and refine your rough estimate.
For my sample, I had the following thoughts based on the characteristics of my leather sample:
- The leather is a bit on the flimsy/floppy side, which means it may not cut as well as a stiffer leather. If it was very flimsy I’d start with a slightly higher cut pressure.
- In this case, I decided to start at the low end of the range and increase on the second test cut if I needed to.

- The sample I’m using does not have a very “furry” fleshy side. The fibers are laid flat and pretty clean. If it was very furry, I’d want to increase the cut pressure.
- In this case, I decided to stick with the lower end of the range because it wasn’t very furry at all.

- The finish on my leather sample was textured, but even and fairly thin.
- Because the finish was so thin, I didn’t think I needed to increase the cut pressure or number of passes.

Taking all this into account, for my first test with this new leather I decided to use the following Cricut settings:
- Cut pressure: 325
- Multi-cut: 2X
- Pressure: Default
Take a look at your leather sample. Decide on the exact values you’ll use for cut pressure, multi-cut passes, and pressure, based on its unique characteristics. When you’ve got these nailed down for your first test, you’re ready to move to the next step.
Step 2: Create a new Custom Material with your test settings
Since you’ll be using a new material with your Cricut, you’ll need to create a new Custom Material entry so that you can define the cut settings for your new leather.
a) Open the settings menu in Cricut Design Space
Open Cricut Design Space, and select the stacked lines icon in the top left corner.

b) Open Manage Custom Materials for your Cricut machine
Make sure your Cricut is connected to your device, and go to Manage Custom Materials. Select your Cricut from the drop down.

c) Select Add New Material
Scroll all the way down to the bottom of your list of selected materials and select Add New Material.

d) Add a descriptive name for your new Custom Material
Cricut Design Space will ask you to fill in the name of your new custom material. Come up with a descriptive name for your leather sample so it’s clear which material it refers to.
- For my leather sample, I called it “Genuine leather – 0.9 mm textured beige”

Save the new material.
e) Enter the values you chose for your first test
Your new material will be added, and you’ll be able to set the values for each setting. Put in the values you have estimated to start with for:
- Cut pressure
- Multi-cut
Indicate the blade type. Note that for intricate cuts, you’ll use the deep-point blade. During my testing, I found that the deep-point blade struggles to cut leather thicker than 1.3 mm, so keep that in mind. Select Save when you’re done.
For my new Custom Material, I entered the settings values from Step 1b:

f) Select “Done”
Scroll back down to the bottom of the Custom Materials list and select Done. You’ve now added your new material and test cut settings and you’re ready to cut.
Step 3: Fill out the tracking sheet
Fill out a new row with the Cricut settings that you’ll be using for your first test cut.
As an example, here’s how I filled out the row for my first test cut.

Step 4: Download the test file
If you haven’t already, make sure you’ve downloaded your test file. You can use the test file provided previously, or your own if you have another one you like.
Step 5: Open the test file in Cricut Design Space and size it correctly
I opened the test file and adjusted the size to 1 inch by 1.22 inch.

Step 6: Prepare the leather for cutting
Prepare your leather for the cut by using a StrongGrip mat. To minimize mess, you can also use StrongGrip transfer tape.
The transfer tape can help protect your mat, but there’s a good chance you’ll cut through it. That’s okay, it still offers protection, but it will be a bit tedious to remove at the end.

Step 7: Set up and run your first test cut
a) Set up your first test cut in Cricut Design Space
Use the Custom Material setting you just created, and adjust the pressure (less, default, more) in the drop down based on the settings you chose for your first test cut.
Get detailed instructions on how to set up your cut in Cricut Design Space.
b) Run the cut
I ran my first test cut for the leather sample I was working with:

Step 8: Examine the results and refine settings as needed
a) Examine the cut
When the test cut is done, remove the mat from the Cricut and examine the cut. Make any notes about the cut in the Notes column of the spreadsheet for your first test cut.
- Tip: Don’t remove the leather from the mat yet. You can avoid having to re-stick the leather for future test cuts if you examine the cut without removing the painter’s tape.
Below are the results of test 1 for my leather sample.

- The cut is almost perfect, but the transfer tape underneath also got cut.
- Only the smallest cut didn’t cut perfectly, but it came pretty close.

b) Decide whether you need to refine the settings and run another test cut
When evaluating the need for another test cut, consider the factors below.
If you got a perfect cut:
- Could you have gotten away with less passes over the leather? Or a lower cut pressure?
- Each pass over the leather makes it more likely that something will move and ruin the cut. Getting the settings as low as you need to get a clean cut is worth a bit of testing.
If you didn’t get a perfect cut:
- Was it good enough for the project you want to make with that leather?
- For example, say the larger shapes cut cleanly, but the very small ones didn’t. The settings may work well for you as long as you only have larger cuts in your project design.
Is this leather actually a good candidate for the Cricut?
- Some leathers don’t cut well, usually because they are low quality or the leather or its finish are too thick.
- Sometimes a particular finish may not stick to the mat very well. In this case, it will be difficult to get a good cut with it regardless of your settings. You could try cutting with the fleshy side down, just be prepared for more mess on your mat.
- Be aware that some leathers cut better with the finished side facing down.
- Sometimes the piece of leather itself varies in thickness. You may need higher settings to get clean cuts on the thicker parts.
- Sometimes you’ll need so many passes to get a good cut that it’s too risky. I usually don’t go over four passes, and even then, it’s a gamble every time. Chances are pretty high that something will get stuck, dislodged, or dragged in the process, ruining the cut.
- For my test, I was happy with the level of intricacy I could achieve. Even though the smallest cut wasn’t clean, I knew I didn’t need that level of detail for the project I had in mind for this leather.
- Since it can be a pain to remove cut up transfer tape from the mat, I thought I’d try another test with lower settings to see if I could avoid cutting the transfer tape.
- I decided to give it one shot with lower cut pressure settings.
c) Update your table for another test cut
If you’ve decided to adjust the settings and run another test cut, record the new settings you’ll be testing in a new row of the same table.
Here’s the next row of the table I filled out for my leather sample:

d) Update the Custom Materials settings
Go back into Manage Custom Materials and update the settings for the custom material you created. They should match the settings you’ve selected for your second test cut.
Step 9: Run another test cut
Load your mat back into the Cricut and set up your second test cut in Cricut Design Space. Use the Custom Material setting you just updated.
I ran my second test cut for the leather sample I was working with:

Step 10: Repeat step 8 and 9 until you’re happy with the cut
It may take a few tries, but eventually you’ll either:
- Zero in on the settings you need to get a clean cut to the level of detail you need for your project.
- Conclude that your leather is not a good candidate to cut with the cricut. Hopefully this isn’t the case, but sometimes that’s just how it goes. 🙁
For my leather sample, my second test cut ended up being worse and still cutting through transfer tape:


I decided to stick with the settings from the first test cut, and just deal with cut up transfer tape on my mat. It still beats the mess from leather fuzz!
Conclusion and next steps
You should now be well-equipped to test new leather samples with your Cricut and find the best Cricut settings for your leather.
For my leather sample, I landed on the following Cricut settings by working through the testing process:
Now I’ll be able to use these settings with this leather for future projects. If you have your own process that you’d like to share, I’d love to read about it in the comments below!
You may be ready to move on to cutting your leather project.
You can also explore these other topics:
- See an overview of how to make a Cricut leather bracelet
- Resize your digital leather bracelet file to get a great fit
- Protect your Cricut mat when cutting leather using transfer tape.
- Dye your leather bracelet to a different colour (or colours!)
- Finish your leather bracelet by conditioning and sealing it