Table of contents | How to protect your Cricut mat when working with leather
Introduction to how to protect your Cricut mat
In this quick tutorial, you’ll learn how to reduce the mess to your Cricut mat when using genuine leather. You only need to do this if you’re using leather that’s not made by Cricut. Cricut leathers are designed to be used with Cricut mats, so they won’t make a mess.
The method below is especially useful when you’re engraving or foiling the leather. This is because you’ll need place the leather with the fleshy, fibrous side down so that your Cricut can work on the surface, and the fibers make a huge mess.
If you’re cutting leather, there’s a good chance you’ll also cut through the transfer tape. That’s okay, it will still protect your Cricut mat. Just keep in mind that it may be a bit tedious to remove at the end of the cut.
What you’ll need
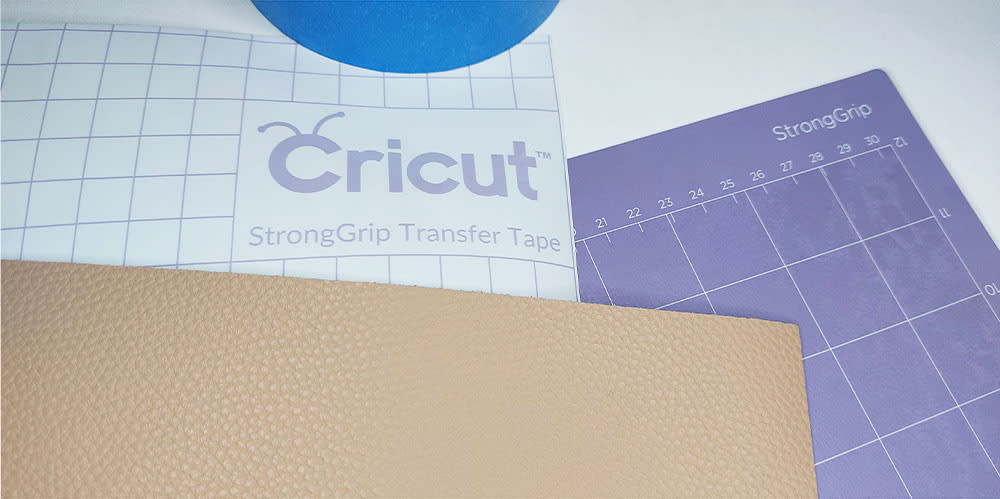
A) A Cricut StrongGrip mat
To cut leather, you’ll need a StrongGrip mat. This is to ensure that the leather (and transfer tape) stick securely to the mat. If it’s not secure, it’s likely to move or bunch up and ruin your cut.

B) StrongGrip transfer tape
Using transfer tape will help minimize mess to your mat and make cleanup easier. Be sure to use StrongGrip transfer tape, since you’ll need everything to stick securely.

C) A pair of scissors
You’ll use these to cut the transfer tape.

D) Your leather of choice
This is the leather you’ll be using for your project.
Tip: If you’re using Cricut-branded leather, you won’t need to use transfer tape. Cricut leather is designed to keep your mat clean, and can be used directly with a StrongGrip mat.

E) A brayer, or something to apply pressure with
You’ll want to reduce the chances of anything moving during cutting. You’ll need something you can use to apply pressure to the transfer tape and leather. This will help maximize contact with the sticky surface. A brayer is great if you have one, but you can also use the side of a glass bottle or something similar.

F) Painter’s tape
Even with a StrongGrip mat and transfer tape, it’s a good idea to secure your leather to the mat with painter’s tape. This will minimize the chances that it will move during cutting.
Painter’s tape isn’t sticky enough to damage your mat. You can also use an alternative, just make sure it’s not so strong that it will peel the colour off your mat when you remove it.

Preparing leather for cutting using transfer tape
Step 1: Cut the transfer tape
Cut a piece of transfer tape that is slightly larger than your leather sample.

Step 2: Apply the transfer tape to your mat
Stick the transfer tape to your mat with the solid white backing part facing upwards. That’s the part you’ll peel off.

Step 3: Peel off the backing from the transfer tape

Step 4: Stick your leather to the transfer tape
If you’re cutting the leather, place the leather so that the fleshy, fibrous side faces up. You’ll probably cut through your transfer tape, so this way you’ll still minimize the mess to your mat. The fibers won’t be facing the sticky part of your mat.
If you’re embossing, engraving, foiling, etc., you’ll need the finished side of the leather facing upwards. In this case, stick the leather to the transfer tape with the fleshy side down.

Step 5: Apply pressure using the brayer
Use the brayer (or something similar, like the side of a glass bottle) to press the leather down onto the mat. This ensures that there are no sections of leather that are not stuck to the mat.

Step 6: Tape down the edges
Even with the StrongGrip transfer tape and mat, leather is at high risk of bunching and shifting. I recommend always taping it down on all sides using painter’s tape.
When applying the tape, keep in mind that you won’t want to cut over the areas with the tape. This is because the glue can get on your blade and make the blade less effective.
Try to apply the tape thinly along the edges of the leather so that you leave enough room for your cut.

And that’s it! You’ve finished preparing your leather for the Cricut.
Conclusion and next steps
You’re now ready to use your leather with the Cricut, and you’ll be minimizing the mess to your mat. You may want to move on to cutting your leather project.
You can also explore these other topics: